![]()
View All CKA Actual Free Exam Questions Jun 24, 2026 Updated
Pass Authentic Linux Foundation CKA with Free Practice Tests and Exam Dumps
The CKA certification is recognized globally and is highly valued by organizations that use Kubernetes in their production environments. Certified Kubernetes Administrator (CKA) Program Exam certification provides IT professionals with a competitive edge in the job market and opens up new career opportunities. The Linux Foundation offers comprehensive training and preparation materials to help candidates prepare for the CKA certification exam. The training includes hands-on labs, online courses, and study materials that cover all the topics and skills required for the exam.
NEW QUESTION # 41
Task Weight: 4%
Task
Scale the deployment webserver to 3 pods.
Answer:
Explanation:
Solution:
NEW QUESTION # 42
You have a Kubernetes cluster with two worker nodes and a single Nginx service deployed. You want to expose this service externally using a LoadBalancer service type but only want traffic to be directed to pods on a specific worker node. How would you achieve this?
Answer:
Explanation:
See the solution below with Step by Step Explanation.
Explanation:
Solution (Step by Step) :
1. Create a Node Selector:
- Create a Node Selector label on the worker node where you want to host the Nginx pods.
- Example: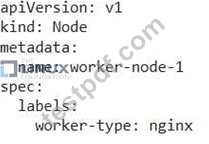
- Apply this configuration using 'kubectl apply -f node-config.yaml'. 2. Configure the Deployment: - Update the Nginx deployment to include the Node Selector label in its pod template. - Example: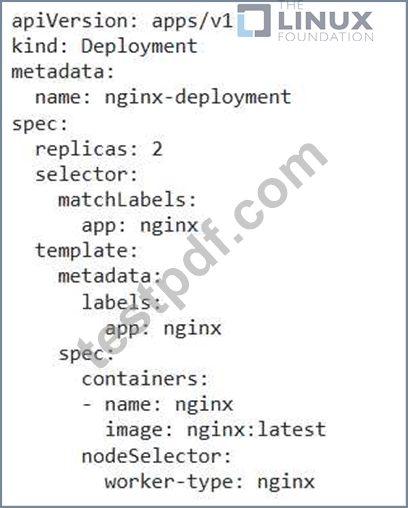
- Apply the updated deployment configuration using 'kubectl apply -f nginx-deployment.yamr. 3. Create a LoadBalancer Service: - Create a LoadBalancer type service that selects the Nginx pods with the 'app=nginx' label. - Example:
- Apply the service configuration using 'kubectl apply -f nginx-service.yamP. 4. Verify the Deployment: - Confirm the deployment of the Nginx pods on the specified worker node using 'kubectl get pods -l app=nginx -o wide'. - Check the LoadBalancer service's external IP address using 'kubectl get services nginx-service'. - Access the Nginx service using the external IP address. All traffic should be routed to the pods on the worker node with the 'worker-type: nginx' label. ---
NEW QUESTION # 43
Create and configure the servicefront-end-serviceso it's accessiblethroughNodePortand routes to theexisting pod namedfront-end.
Answer:
Explanation:
See the solution below.
Explanation
solution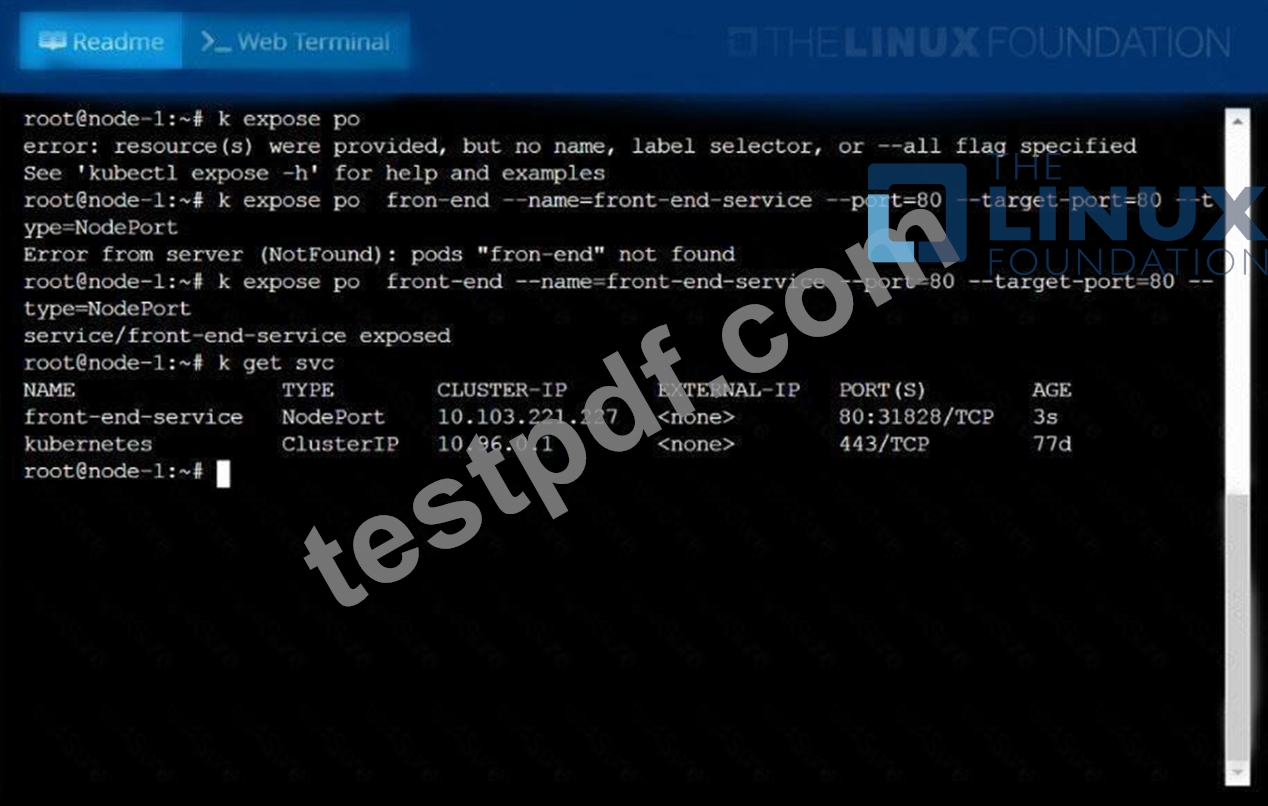
NEW QUESTION # 44
Check the image version in pod without the describe command
Answer:
Explanation:
See the solution below.
Explanation
kubectl get po nginx -o
jsonpath='{.spec.containers[].image}{"\n"}'
NEW QUESTION # 45
List all configmap and secrets in the cluster in all namespace and write it to a file /opt/configmap-secret
Answer:
Explanation:
kubectl get configmap,secrets --all-namespaces > /opt/configmap-secret // Verify Cat /opt/configmap-secret
NEW QUESTION # 46
Check the image version in pod without the describe command
Answer:
Explanation:
kubectl get po nginx -o
jsonpath='{.spec.containers[].image}{"\n"}'
NEW QUESTION # 47
Create 2 nginx image pods in which one of them is labelled with env=prod and another one labelled with env=dev and verify the same.
Answer:
Explanation:
kubectl run --generator=run-pod/v1 --image=nginx -- labels=env=prod nginx-prod --dry-run -o yaml > nginx-prodpod.yaml Now, edit nginx-prod-pod.yaml file and remove entries like "creationTimestamp: null" "dnsPolicy: ClusterFirst" vim nginx-prod-pod.yaml apiVersion: v1 kind: Pod metadata:
labels:
env: prod
name: nginx-prod
spec:
containers:
- image: nginx
name: nginx-prod
restartPolicy: Always
# kubectl create -f nginx-prod-pod.yaml
kubectl run --generator=run-pod/v1 --image=nginx --
labels=env=dev nginx-dev --dry-run -o yaml > nginx-dev-pod.yaml
apiVersion: v1
kind: Pod
metadata:
labels:
env: dev
name: nginx-dev
spec:
containers:
- image: nginx
name: nginx-dev
restartPolicy: Always
# kubectl create -f nginx-prod-dev.yaml
Verify :
kubectl get po --show-labels
kubectl get po -l env=prod
kubectl get po -l env=dev
NEW QUESTION # 48
Perform the following tasks:
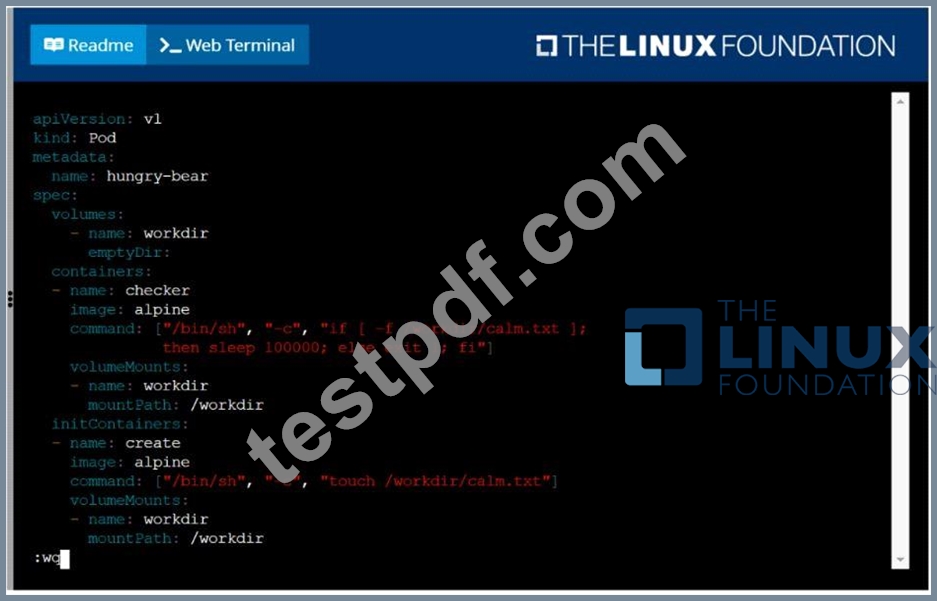
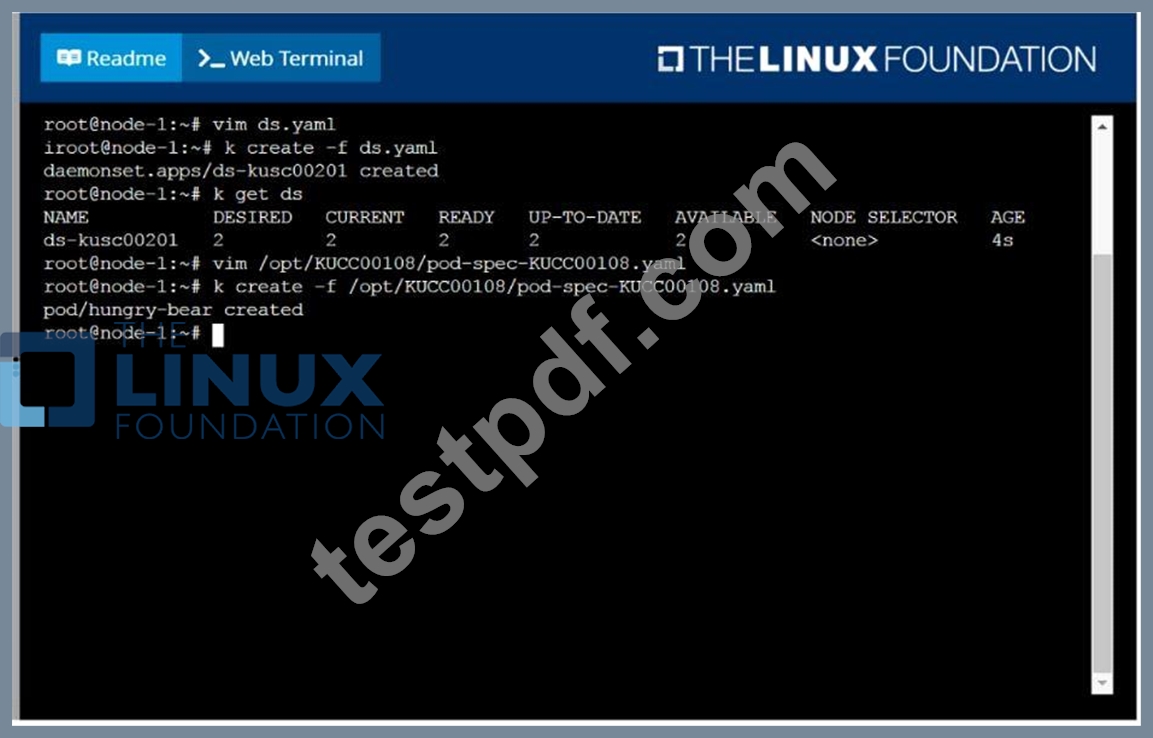
Add an init container to hungry-bear (which has been defined in spec file /opt/KUCC00108/pod-spec-KUC C00108.yaml ) The init container should create an empty file named /workdir/calm.txt If /workdir/calm.txt is not detected, the pod should exit Once the spec file has been updated with the init container definition, the pod should be created
Answer:
Explanation:
solution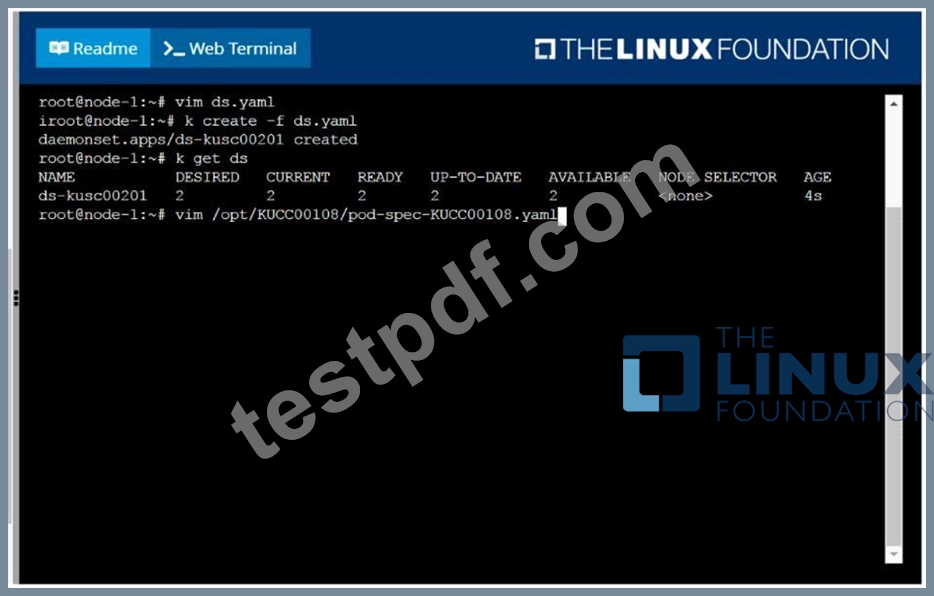
NEW QUESTION # 49
You are running a stateful application on Kubernetes with a Deployment that manages five pods. Each pod has a persistent volume claim (PVC) that mounts a volume to store application dat a. You need to ensure that the pods are always deployed in the same order and that data is consistently accessed from the same PVC. How can you achieve this using Kubernetes features?
Answer:
Explanation:
See the solution below with Step by Step Explanation.
Explanation:
Solution (Step by Step) :
1. Enable StatefulSet: Create a StatefulSet instead of a Deployment. StatefulSets are specifically designed to manage stateful applications.
2. Use the 'podManagementPolicy' Field: Set the 'podManagementPolicy' field to 'OrderedReady' in the spec' section of your StatefulSet to ensure that pods are deployed in the same order and become ready before new pods are deployed. This policy guarantees that the previous pod is ready before the next one is started.
3. Utilize Persistent Volumes: Ensure that your PVCs are bound to persistent volumes (PVs). PVs are the underlying storage resources that back your PVCs. They are usually provisioned using a storage class.
4. Set 'serviceName': The 'serviceName' field should be specified in the StatefulSet to create a service for accessing the application. This service allows you to access the application based on its name, regardless of which pod is currently serving the requests.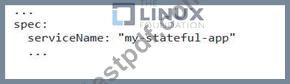
5. Verify Deployment: After applying the YAML, check the status of your StatefulSet using 'kubectl get statefulset my-stateful-app'. Ensure that the pods are deployed in the specified order and are running. You can also verify the PVCs using 'kubectl get pvc' to make sure they are bound to the correct PVs.
NEW QUESTION # 50
Create an nginx pod and list the pod with different levels of verbosity See the solution below.
Answer:
Explanation:
// create a pod
kubectl run nginx --image=nginx --restart=Never --port=80
// List the pod with different verbosity
kubectl get po nginx --v=7
kubectl get po nginx --v=8
kubectl get po nginx --v=9
NEW QUESTION # 51
You have a Deployment named 'mysql-deployment' running a MySQL database server. You need to store the MySQL root password securely using a Secret. This password should be used by the database server when it starts.
Answer:
Explanation:
See the solution below with Step by Step Explanation.
Explanation:
Solution (Step by Step) :
1. Create the Secret:
- Create a Secret named 'mysql-password' to store the root password.
- Use the 'kubectl create secret generic' command with the '--from-literal' flag to create a generic Secret with a key-value pair:
kubectl create secret generic mysql-password -from-literal=mysql-root password="your_strong_password"
2. Modify the Deployment:
- Update the 'mysql-deployment' Deployment's Pod template to mount the mysql-password' Secret as a volume.
- Use 'volumeMounts' to specify where the Secret should be mounted within the container, and 'volumes' to define the Secret as a volume source.
- Update the MySQL server's configuration (e.g., the 'my.cnf file) to read the password from the mounted volume.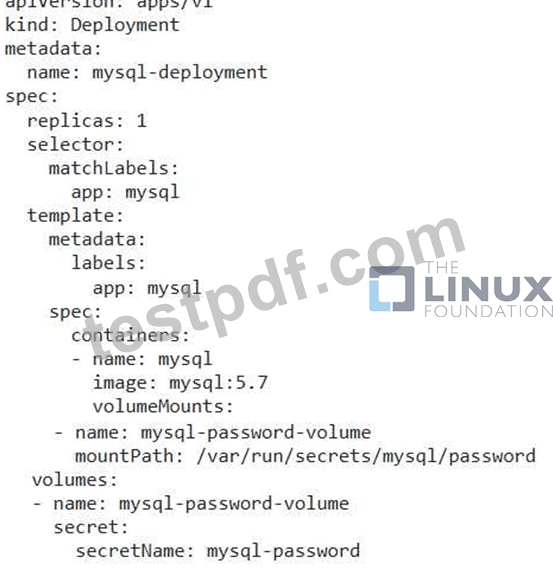
3. Apply the Changes: - Apply the modified Deployment YAML using 'kubectl apply -f mysql-deployment.yamP. 4. Restart the MySQL Pod: - Restart the MySQL pod for it to read the password from the mounted volume. This can be achieved using 'kubectl delete pod'. 5. Verify the Password: - Connect to the MySQL database using the provided password and confirm it works correctly.
NEW QUESTION # 52
Install a kubernetes cluster with one master and one worker using kubeadm
- A. This is a straightforward question, you need to install kubernetes cluster using kubeadm with one master and one worker.
Installation is considered success once both master and worker
nodes become available.
Refer : https://kubernetes.io/docs/setup/production-environment/tools/kubeadm/ - B. This is a straightforward question, you need to install kubernetes cluster using kubeadm with one master and one worker.
Refer : https://kubernetes.io/docs/setup/production-environment/tools/kubeadm/
Answer: A
NEW QUESTION # 53
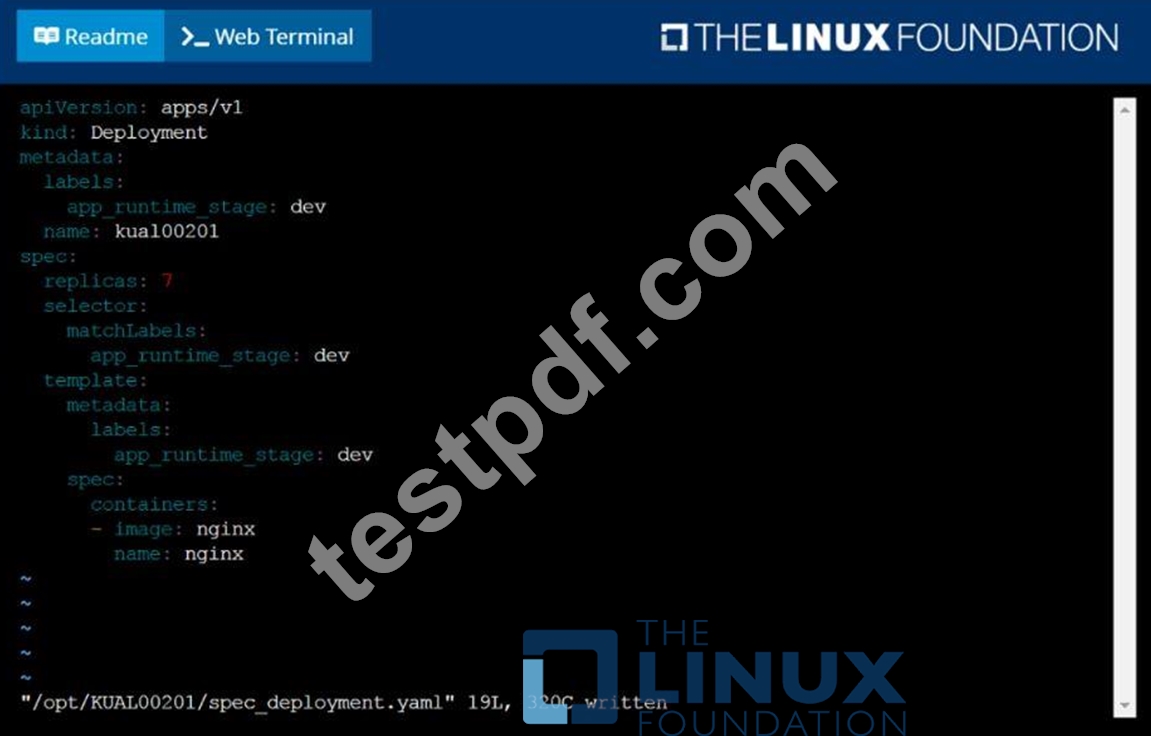
Create a deployment spec file that will:
* Launch 7 replicas of the nginx Image with the labelapp_runtime_stage=dev
* deployment name: kual00201
Save a copy of this spec file to /opt/KUAL00201/spec_deployment.yaml
(or /opt/KUAL00201/spec_deployment.json).
When you are done, clean up (delete) any new Kubernetes API object that you produced during this task.
Answer:
Explanation: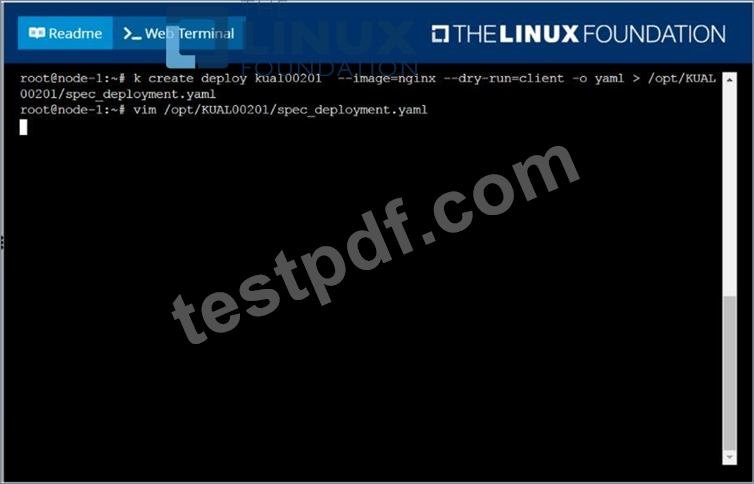
NEW QUESTION # 54
Schedule a pod as follows:
Name: nginx-kusc00101
Image: nginx
Node selector: disk=ssd
Answer:
Explanation:
See the solution below.
Explanation
solution
F:\Work\Data Entry Work\Data Entry\20200827\CKA\6 B.JPG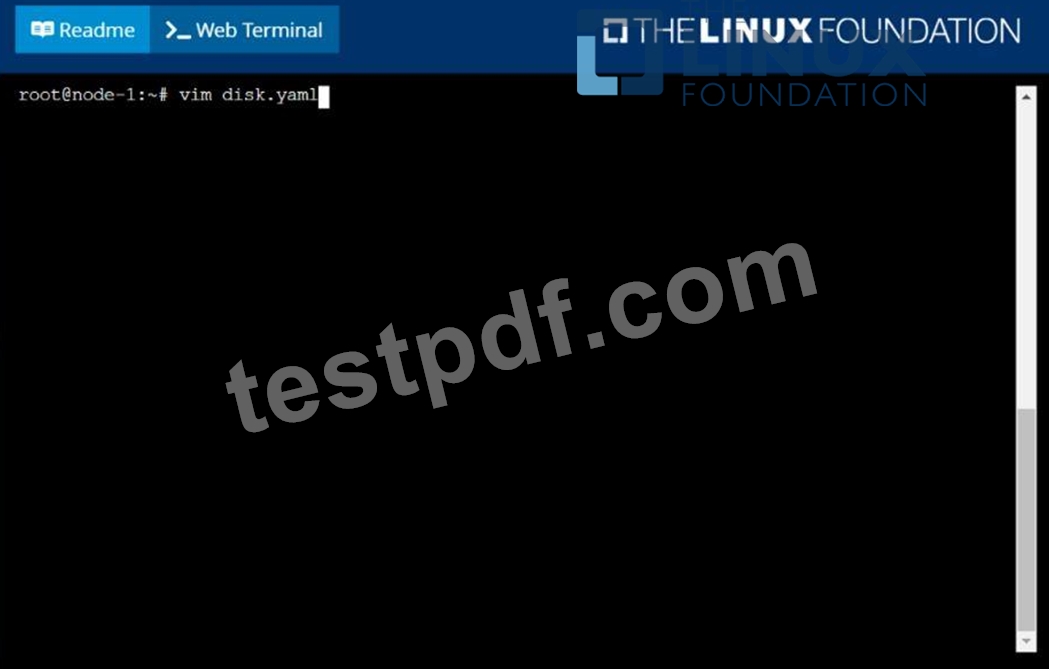
F:\Work\Data Entry Work\Data Entry\20200827\CKA\6 C.JPG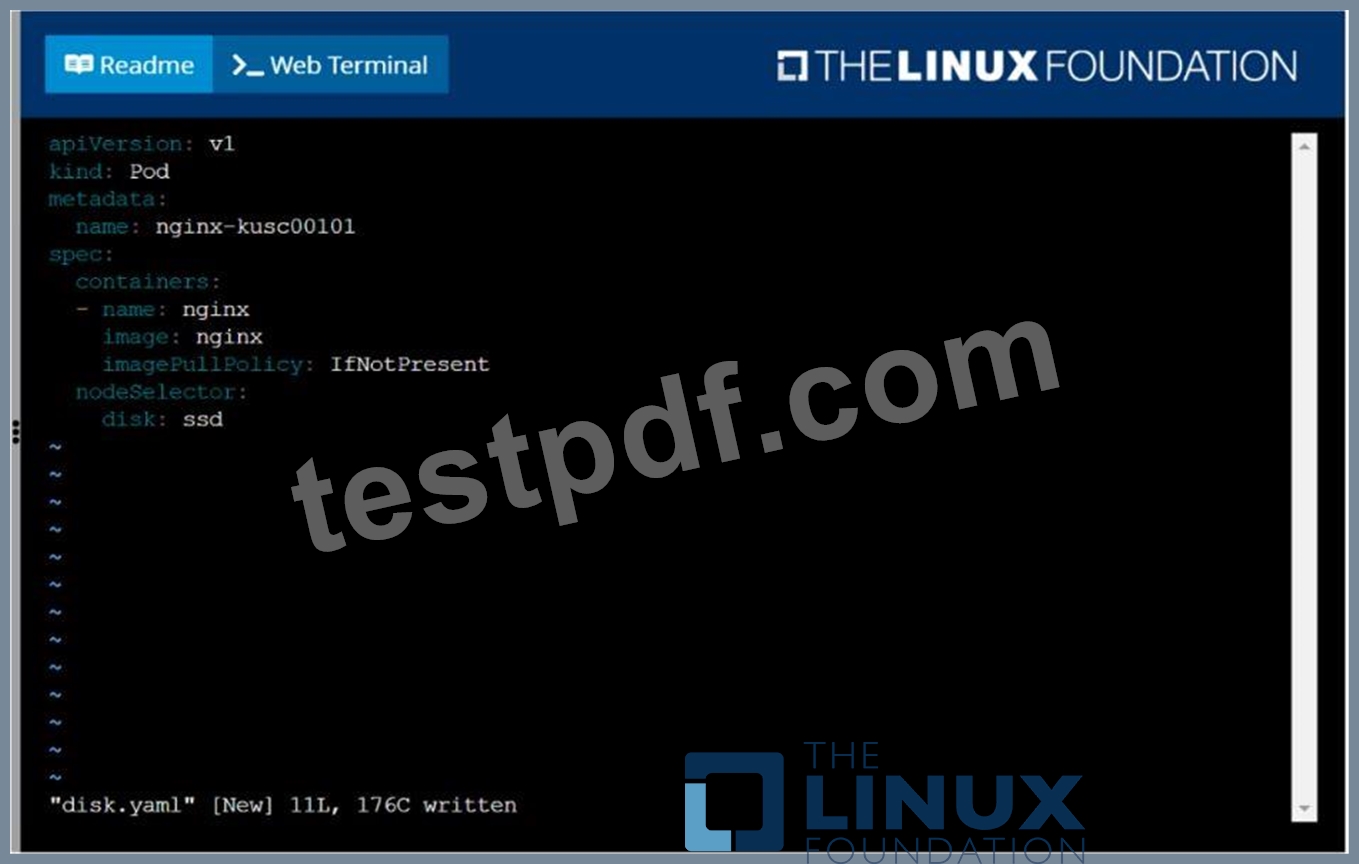
F:\Work\Data Entry Work\Data Entry\20200827\CKA\6 D.JPG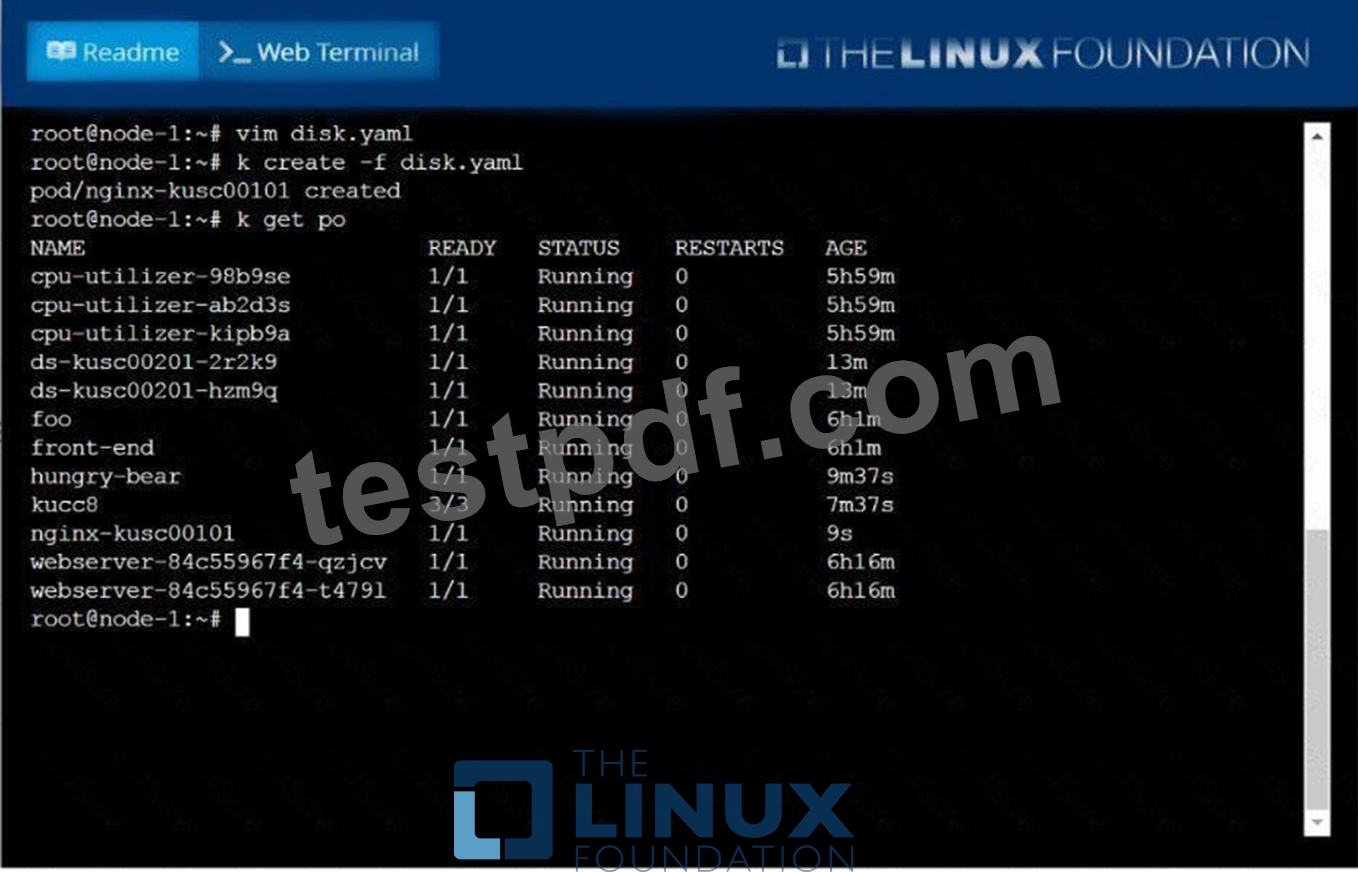
NEW QUESTION # 55
Score: 7%
Task
Create a new NetworkPolicy named allow-port-from-namespace in the existing namespace echo. Ensure that the new NetworkPolicy allows Pods in namespace my-app to connect to port 9000 of Pods in namespace echo.
Further ensure that the new NetworkPolicy:
* does not allow access to Pods, which don't listen on port 9000
* does not allow access from Pods, which are not in namespace my-app
Answer:
Explanation:
Solution:
#network.yaml
apiVersion: networking.k8s.io/v1
kind: NetworkPolicy
metadata:
name: allow-port-from-namespace
namespace: internal
spec:
podSelector:
matchLabels: {
}
policyTypes:
- Ingress
ingress:
- from:
- podSelector: {
}
ports:
- protocol: TCP
port: 8080
#spec.podSelector namespace pod
kubectl create -f network.yaml
NEW QUESTION # 56
Create a pod with image nginx called nginx and allow traffic on port 80
Answer:
Explanation:
kubectl run nginx --image=nginx --restart=Never --port=80
NEW QUESTION # 57
Create an nginx pod with containerPort 80 and with a PersistentVolumeClaim "task-pv-claim" and has a mouth path "/usr/share/nginx/html"
- A. vim nginx-pvc-pod.yaml
apiVersion: v1
kind: Pod
metadata:
name: task-pv-pod
spec:
volumes:
- name: task-pv-storage
persistentVolumeClaim:
claimName: task-pv-claim
containers:
- name: task-pv-container
image: nginx
ports:
- containerPort: 80
name: "http"
volumeMounts:
- mountPath: "/usr/share/nginx/html"
name: task-pv-storage
kubectl apply -f nginx-pvc-pod.yaml
// Verify
kubectl describe po "POD-Name" | grep -i volumes -A5
Volumes:
task-pv-storage:
Type: PersistentVolumeClaim (a reference to a
PersistentVolumeClaim in the same namespace)
ClaimName: task-pv-claim
ReadOnly: false - B. vim nginx-pvc-pod.yaml
apiVersion: v1
kind: Pod
metadata:
name: task-pv-pod
spec:
volumes:
- name: task-pv-storage
persistentVolumeClaim:
claimName: task-pv-claim
containers:
- name: task-pv-container
image: nginx
ports:
- containerPort: 60
name: "http"
volumeMounts:
- mountPath: "/usr/share/nginx/html"
name: task-pv-storage
kubectl apply -f nginx-pvc-pod.yaml
// Verify
kubectl describe po "POD-Name" | grep -i volumes -A4
Volumes:
task-pv-storage:
Type: PersistentVolumeClaim (a reference to a
PersistentVolumeClaim in the same namespace)
ClaimName: task-pv-claim
ReadOnly: false
Answer: A
NEW QUESTION # 58
Create a pod that echo "hello world" and then exists. Have the pod deleted automatically when it's completed
Answer:
Explanation:
See the solution below.
Explanation
kubectl run busybox --image=busybox -it --rm --restart=Never --
/bin/sh -c 'echo hello world'
kubectl get po # You shouldn't see pod with the name "busybox"
NEW QUESTION # 59
Create a file:
/opt/KUCC00302/kucc00302.txt that lists all pods that implement service baz in namespace development.
The format of the file should be one pod name per line.
Answer:
Explanation:
See the solution below.
Explanation
solution
F:\Work\Data Entry Work\Data Entry\20200827\CKA\11 B.JPG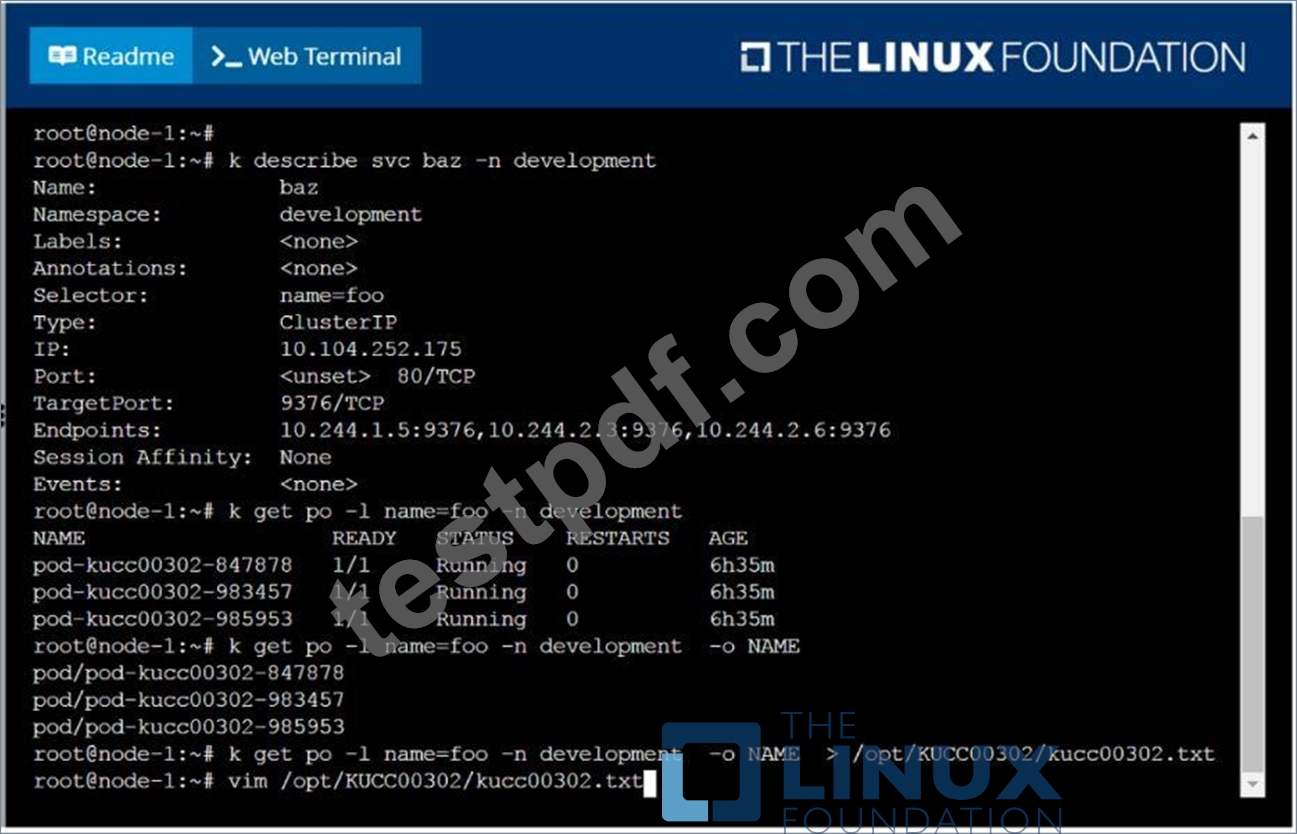
F:\Work\Data Entry Work\Data Entry\20200827\CKA\11 C.JPG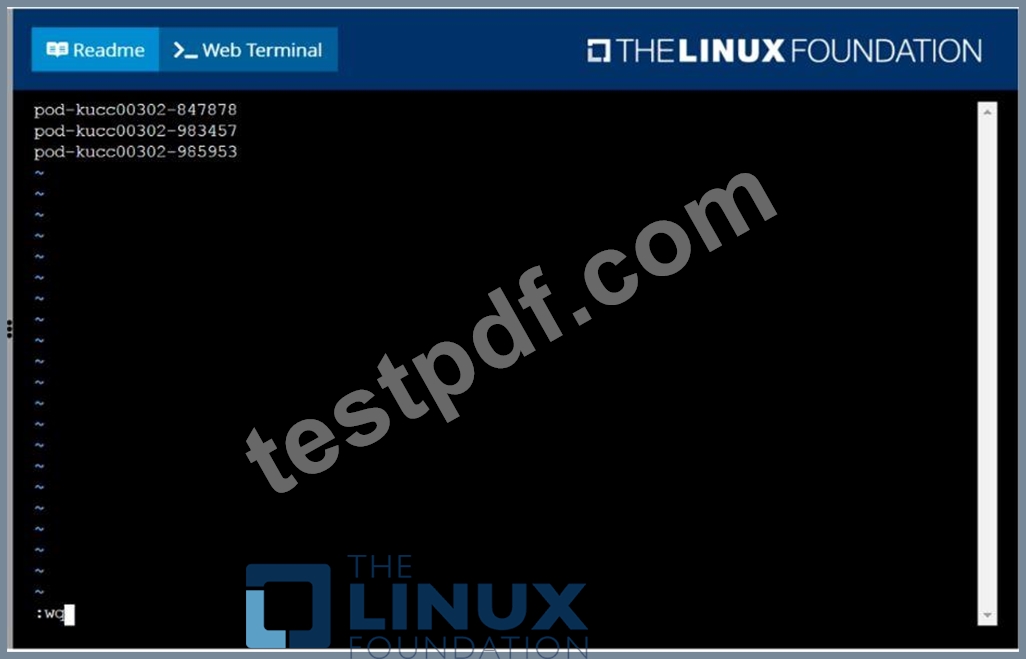
F:\Work\Data Entry Work\Data Entry\20200827\CKA\11 D.JPG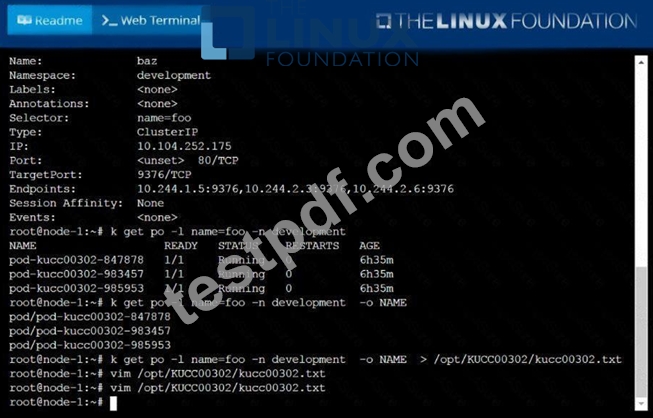
NEW QUESTION # 60
Score:7%
Task
Create a new PersistentVolumeClaim
* Name: pv-volume
* Class: csi-hostpath-sc
* Capacity: 10Mi
Create a new Pod which mounts the PersistentVolumeClaim as a volume:
* Name: web-server
* Image: nginx
* Mount path: /usr/share/nginx/html
Configure the new Pod to have ReadWriteOnce
Finally, using kubectl edit or kubectl patch PersistentVolumeClaim to a capacity of 70Mi and record that change.
Answer:
Explanation:
See the solution below.
Explanation
Solution:
vi pvc.yaml
storageclass pvc
apiVersion: v1
kind: PersistentVolumeClaim
metadata:
name: pv-volume
spec:
accessModes:
- ReadWriteOnce
volumeMode: Filesystem
resources:
requests:
storage: 10Mi
storageClassName: csi-hostpath-sc
# vi pod-pvc.yaml
apiVersion: v1
kind: Pod
metadata:
name: web-server
spec:
containers:
- name: web-server
image: nginx
volumeMounts:
- mountPath: "/usr/share/nginx/html"
name: my-volume
volumes:
- name: my-volume
persistentVolumeClaim:
claimName: pv-volume
# craete
kubectl create -f pod-pvc.yaml
#edit
kubectl edit pvc pv-volume --record
NEW QUESTION # 61
Score: 7%
Task
Reconfigure the existing deployment front-end and add a port specification named http exposing port 80/tcp of the existing container nginx.
Create a new service named front-end-svc exposing the container port http.
Configure the new service to also expose the individual Pods via a NodePort on the nodes on which they are scheduled.
Answer:
Explanation:
See the solution below.
Explanation
Solution:
kubectl get deploy front-end
kubectl edit deploy front-end -o yaml
#port specification named http
#service.yaml
apiVersion: v1
kind: Service
metadata:
name: front-end-svc
labels:
app: nginx
spec:
ports:
- port: 80
protocol: tcp
name: http
selector:
app: nginx
type: NodePort
# kubectl create -f service.yaml
# kubectl get svc
# port specification named http
kubectl expose deployment front-end --name=front-end-svc --port=80 --tarport=80 --type=NodePort
NEW QUESTION # 62
You have a deployment named 'my-app' running a web application that uses an external database service. You need to configure a 'ClusterlP' service to route traffic to the external database service.
Answer:
Explanation:
See the solution below with Step by Step Explanation.
Explanation:
Solution (Step by Step) :
1 . Create the ClusterlP service:
- Create a 'ClusterlP' service that points to the external database service using the 'externalName' field.
2. Apply the service: - Apply the YAML file using 'kubectl apply -f external-db-service.yamr 3. Verify the service: - Check the status of the service using 'kubectl get services external-db-service -n ' 4. Test the service: - From a pod in the same namespace as the service, try to connect to the external database service using the 'external-db-service' service name and port. Note: - Replace with the actual namespace. - Replace 'my-external-db.example.com' with the actual hostname of your external database service. - Ensure that your cluster has access to the external database service.
NEW QUESTION # 63
......
Linux Foundation CKA Program is a certification exam that validates one's skills and knowledge in Kubernetes administration. CKA exam is designed for IT professionals who have experience in administering Kubernetes clusters and covers a range of topics from basic to advanced. Certified Kubernetes Administrator (CKA) Program Exam certification is widely recognized in the industry and is a valuable asset for IT professionals. The CKA certification can lead to better job opportunities and higher salaries, and it is a stepping stone to more advanced Kubernetes certifications.
New CKA Exam Questions Real Linux Foundation Dumps: https://www.testpdf.com/CKA-exam-braindumps.html
Course 2026 CKA Test Prep Training Practice Exam Download: https://drive.google.com/open?id=1teRLP70b9Far_9ImJpmZirwi7G5L6ztl